Callibrating Intel Reasense d435 with Ros and OpenCV-Python
Prerequisites
Assuming you have Ubuntu 16.04, following applications must be installed in order that everything works:
- OpenCV2. You can refer for example to this tutorial.
- OpenCV-Python
sudo apt-get install python-opencv
- ROS Kinetic for Ubuntu 16.04.
Installing RealSense
- Install the drivers.
- Download the RealSense repository from here and extract it to your ROS workspace.
- Build the package
catkin_make clean
catkin_make -DCATKIN_ENABLE_TESTING=False -DCMAKE_BUILD_TYPE=Release
catkin_make install
echo "source path_to_workspace/devel/setup.bash" >> ~/.bashrc
source ~/.bashrc
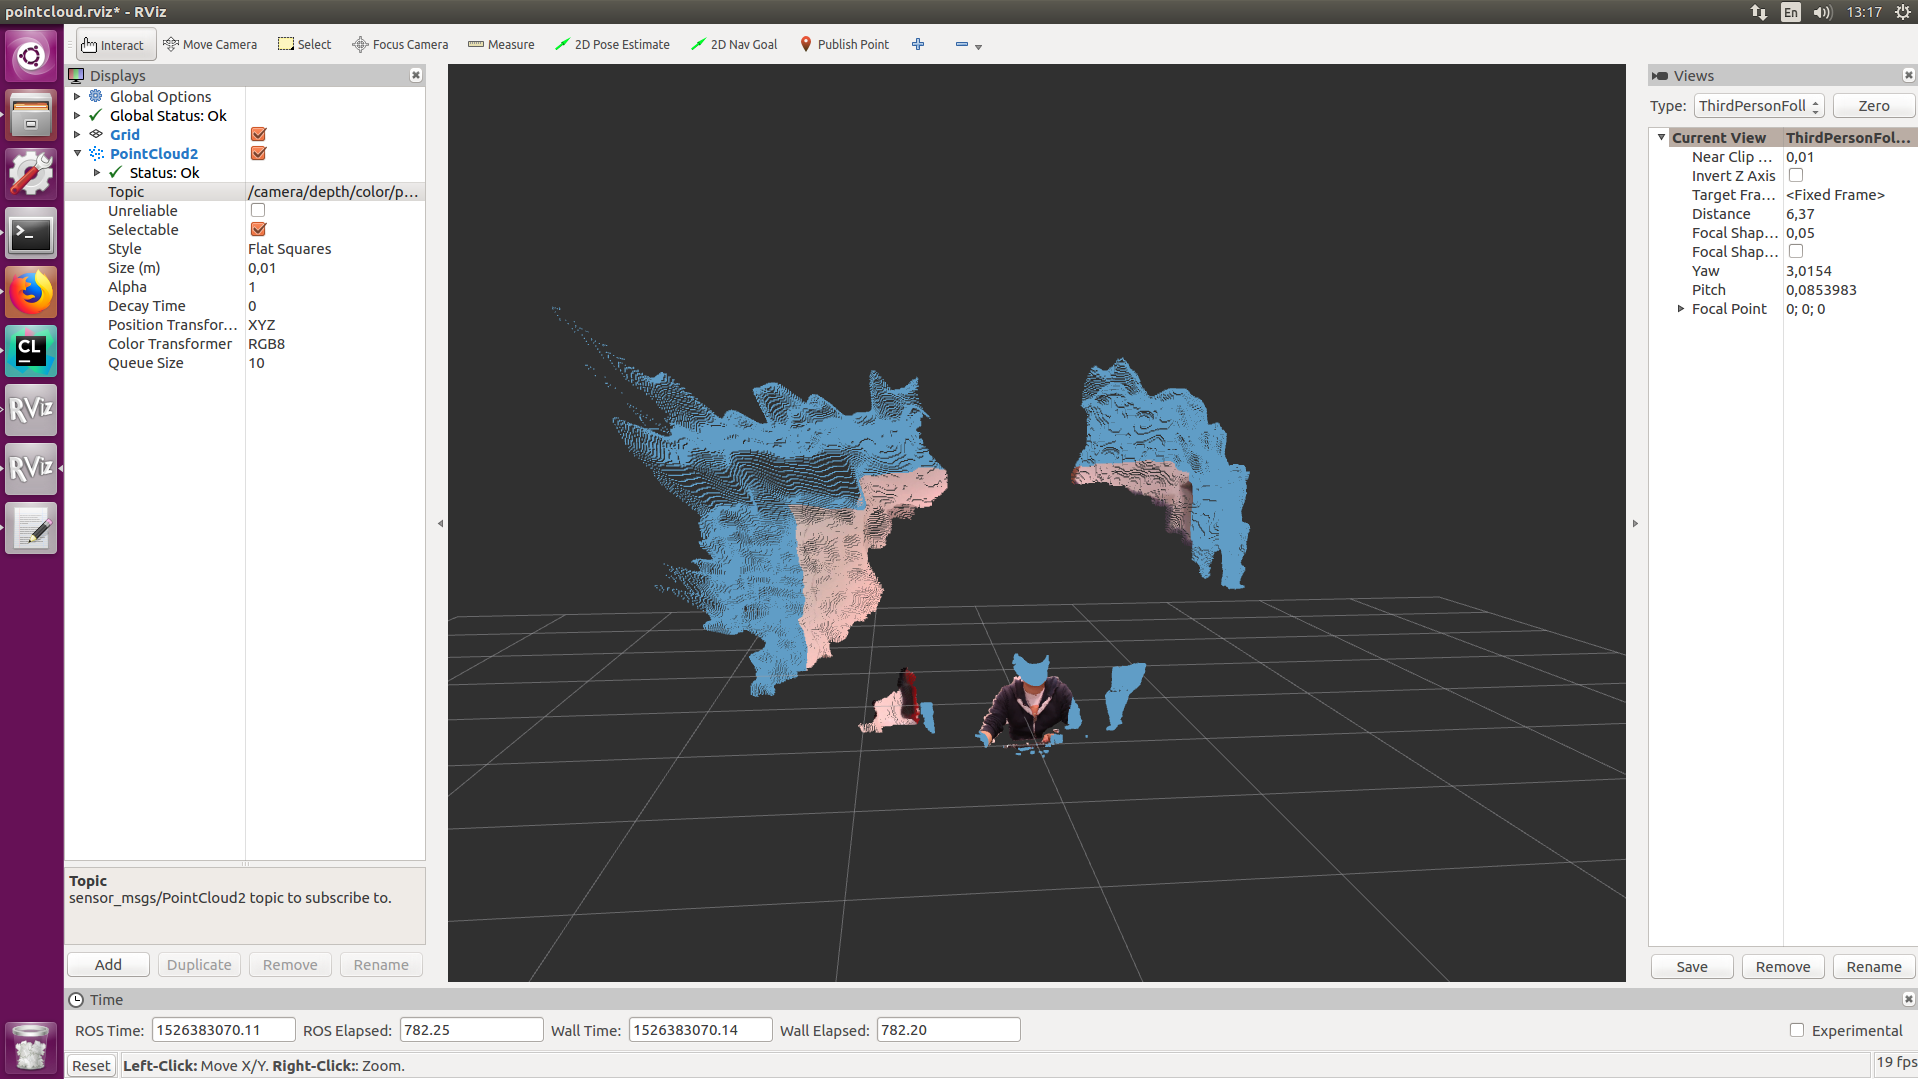
Testing the camera
Connect the RealSense camera via USB and run the demo launch file
roslaunch realsense2_camera demo_pointcloud.launch
This command will open rviz where you will see the point clouds from the camera comming from the topic
/camera/depth/color/points.
Calibrating the camera using OpenCV2-Python
The following codebase is an adapted version of this tutorial from OpenCV.
import numpy as np
import cv2
import glob

# termination criteria
criteria = (cv2.TERM_CRITERIA_EPS + cv2.TERM_CRITERIA_MAX_ITER, 30, 0.001)

# prepare object points for a 8x6 chess board
objp = np.zeros((6*8,3), np.float32)
objp[:,:2] = np.mgrid[0:8,0:6].T.reshape(-1,2)

# Arrays to store object points and image points from all the images.
objpoints = [] # 3d point in real world space
imgpoints = [] # 2d points in image plane.

images = glob.glob('/path_to_images/*.png')

for fname in images:
    img = cv2.imread(fname)
    gray = cv2.cvtColor(img,cv2.COLOR_BGR2GRAY)

    # Find the chess board corners
    ret, corners = cv2.findChessboardCorners(gray, (8,6),None)

    # If found, add object points, image points (after refining them)
    if ret == True:
        objpoints.append(objp)

        corners2 = cv2.cornerSubPix(gray,corners,(11,11),(-1,-1),criteria)
        imgpoints.append(corners2)

        # Draw and display the corners
        img = cv2.drawChessboardCorners(img, (8,6), corners2,ret)
        cv2.imshow('img',img)
        cv2.waitKey(500)

cv2.destroyAllWindows()

ret, mtx, dist, rvecs, tvecs = cv2.calibrateCamera(objpoints, imgpoints, gray.shape[::-1],None,None)
np.save('/path_to_images/calibration', [mtx, dist, rvecs, tvecs])
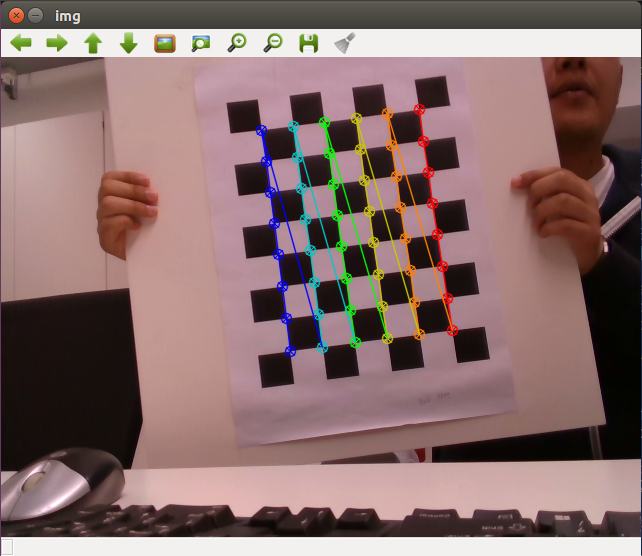
Before executing the script, you will need to get the images from the camera with capturing the chess board (8x6 in our example). See e.g. this link for more information. We will need at least 10 images for calibration. Once you have the images, execute the provided script. After executing, you will see the images with the detected corners on it.
Once the script is done, it will save the calibration data into the file
calibration.npy. To reuse this data, use the following script:
calibration_data = np.load('path_to_images/calibration.npy')
mtx = calibration_data[0]
dist = calibration_data[1]
rvecs = calibration_data[2]
tvecs = calibration_data[3]
Conclusion
We have seen how to calibrate the RealSense camera using OpenCV2 and ROS. In the next post, we will figure out how to use the RealSense camera to detect the aruco markers using Python.